Master Exhibition Checkpoint Boost
$54.99 Original price was: $54.99.$24.99Current price is: $24.99.
Master exhibition checkpoint boost
The Requirements for Master Exhibition Checkpoint Boosting: 1581 Power or higher
This is ONLY a checkpoint completion. Full clears may be found in the “Master Vault of Glass” section.
For prizes, this may be cleared once per character every weekly reset.
The Weekly Challenge is also included – (Only if Available On The Desired Week.)
“x 1 Raid Checkpoint Clear”
*This product DOES NOT REQUIRE A CHECKPOINT TO BE PURCHASED.
Master Exhibition checkpoint boosting guide
We’ll go over the Defenses Down challenge for the Exhibition encounter in this Destiny 2 guide, as well as various tactics for completing it.
The third challenge in the Destiny 2: The Witch Queen’s Vow of the Disciple raid was released the week of April 5, 2022. On a weekly basis, the raid’s tasks will alternate through the four raid encounters.
Master Exhibition checkpoint carries and recoveries
Accomplish the Exhibition encounter without allowing more than one protected Disciple’s Hourglass Knight to be killed in order to complete the Base Information challenge. That’s the Taken Knight that you have to kill with the Darkness Laser in order to lengthen the duration of the battle.
To refresh your memory on the encounter or raid itself, you may refer to our Vow of the Disciple raid guide for more information.
Here’s a link to a video:
Master Exhibition checkpoint carry and recovery with paid services
With each successful damage phase, the fight will advance one story up the Pyramid. The conflict takes place on three stories, with a last stand. This implies players must repeat the mechanics three times before reducing the boss’ health to zero.
The Caretaker may be taken down in three ways: stunning, running/obelisk, and adding clear. There are no hard-and-fast rules on how many people should be on each squad, but more than one runner is almost required, and more than one person should assist in stunning the boss. The mechanics for the Caretaker encounter are listed here.
Team one consists of runners Master Exhibition recovery
The approach for this encounter is rather easy, although you will want to discuss the rotation of relics with your party before the encounter begins to ensure that everyone understands the rules.
It is possible to finish this challenge by killing just one Knight in each chamber if your party is swift enough, but it is not recommended. This simply implies that four separate persons will be required to participate in the Darkness Laser test. As a result, the only thing that needed to be changed was the relic rotation so that a different person utilized the Darkness Laser in each area, which was something our group had previously done. A example rotation for this method is shown in the table below.
DESTINY 2 DEFENSES DOWN CHALLENGE 1
| Room | Player 1 | Player 2 | Player 3 | Player 4 | Player 5 | Player 6 |
|---|---|---|---|---|---|---|
| A | Darkness Laser | |||||
| B | Darkness Laser | Templar Shield | ||||
| C | Eye of Riven | Darkness Laser | Templar Shield | |||
| D | Eye of Riven | Darkness Laser | Templar Shield |
While it is easier to complete this challenge by only shooting one Knight, you can do it with all six players shooting a Knight. There are seven total Knights in the encounter, the first one in the starting room, and two per room after, so you will need to skip one Knight. The easiest Knight to skip is the second Knight in room two. This room only has two Relics, and you can complete this room quickly, so skip this one. The most difficult part of this challenge is creating the rotation, so take some time before the encounter to talk it out with your group. Below is a sample rotation for this strategy.
Team two astonishes Team one consists of runners Master Exhibition carry
.
Another important mechanic in the combat is stunning the Caretaker, which gives the runners enough time to collect and shoot all of the symbols. At least one designated stunner is required, while two can help to clarify the tactic.
DESTINY 2 DEFENSES DOWN CHALLENGE 2
| Room | Player 1 | Player 2 | Player 3 | Player 4 | Player 5 | Player 6 |
|---|---|---|---|---|---|---|
| A | Darkness Laser | |||||
| B | Darkness Laser | Templar Shield | ||||
| C | Eye of Riven | Darkness Laser | Templar Shield | |||
| D | Eye of Riven | Darkness Laser | Templar Shield |
The full 75-second timer resets when you place the Darkness Laser into the holder at the end of every room. This means that you can place the other two relics into their holders and start your 30-second cooldown while the Darkness Laser player holds onto it until the two other relic players’ cooldowns are gone or you run low on time. This should make the rotations in the final two rooms easier.
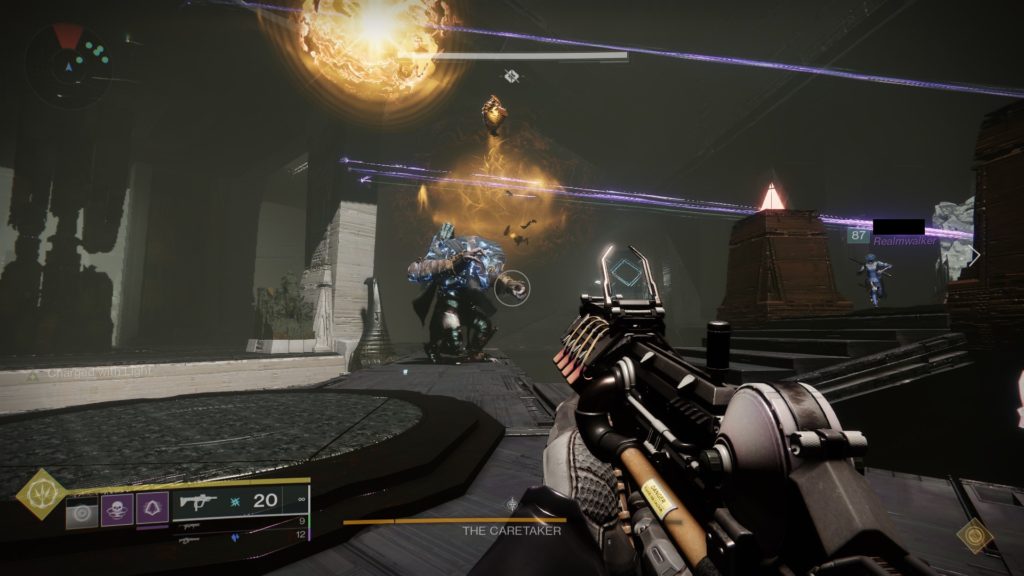
The Caretaker’s face and back are both vulnerable. Shooting its back will cause it to flinch and kneel for a few seconds, giving the rest of the fireteam time to react. The back can only be shot after the Caretaker has been shot in the face with a special buff, and this is the foundation of the stun team’s gameplay.
One player must approach the Caretaker up close and personal, baiting one of its stomp assaults (which are rather easy to withstand outside of contest mode). After being slammed, if you get close enough, you’ll get a boost. You’ll be able to shoot the Caretaker’s face and open up the crit area in its back with this perk. To bring the Caretaker to its knees, another guardian should shoot the vulnerable place on its back. Be careful since pillars and scenery (particularly in the initial encounter) might sometimes obscure the line of sight to the back’s weak place.
Players can normally have two guardians on stun duty (one for shooting the face and the other for the rear weak area), or one stunner and three guardians committed to add clear, with whoever has a line of sight shooting the back. The strategies differ, and each has advantages and disadvantages, so choose the one that works best for your fireteam.
Team three: offer some clarity Master Exhibition recovery and recovs
Clearing advertisements is the third function, but just because it isn’t glamorous doesn’t mean it isn’t important. Throughout the encounter, several waves of Taken adversaries will emerge, including snipers who can kill or at least injure the rest of the team. In addition, Abated Adherents, Scorn units, will try to destroy the obelisks, just as they did in the first encounter, therefore clearing them is necessary.
Finally, during stun periods, the boss will fire some projectiles into the air. Because they can pile up and hit other guardians, the add clear team can knock them out as soon as feasible. We recommend using Witherhoard and a devastating Heavy weapon like a linear fusion rifle or a rocket launcher for add clear.
Phase of Damage Master Exhibition paid services and carries
The damage phase will begin immediately after the boss reaches the platform with the obelisk after the runners have shot all of the symbols in the obelisk. To harm the Caretaker, players must stand within three circles that will be spread out over each floor. Each circle will light and grant players the Resonant Fury boost, indicating that the boss is no longer resistant to harm. A notification will appear after a few seconds, and participants can prepare to proceed to the next circle. The damage phase will always start from the side where the Caretaker initially emerged on the platform, as a general rule. Set up for damage on the circle on the right if he’s walking up the steps on the right side of the obelisk.
Due to the Caretaker’s vast crit spot and the likelihood of debuffing from other sources, Divinity may not be required, especially outside of contest mode. However, when considering the visual clutter from other abilities, the Divinity bubble can help players land crits more regularly. Because players will move out of each circle, Well of Radiance isn’t very effective, but a well-placed Ward of Dawn can allow players to recharge the Weapons of Light boost after each circle for extra damage. Finally, if you’re employing destructive supers like Shadowshot or Nova Bomb, don’t jump when casting otherwise you’ll lose the buff if you travel too far from the plate.
If you hurt the Caretaker too badly in a single phase, it will teleport out before the remaining plates activate. This is done on purpose to guarantee that players complete all of the required floors.
The last stand with Master Exhibition paid service recoveries and carries
Before reaching the last stand location, players must repeat the mechanics three times, shooting a total of three obelisks. Shooting each obelisk will summon a flight of steps, taking the fight higher and into chambers with increasingly complicated design. If you do enough damage to the Caretaker throughout the fight, it will reach the final stand, which isn’t anything that different from the rest of the fight. The circles will be spread out in a straight corridor, and guardians will get closer and closer to the monster until its health is depleted.
After completing the final stand, a chest with your reward should appear, indicating the start of the raid’s next stage: a leaping puzzle leading to the mechanic-heavy third encounter.

Loadouts that are recommended
If Particle Deconstruction or Breach and Clear ever return, gamers can expect to see linear fusion rifles or grenade launchers to carve out a place in the damage meta. Izanagi’s Burden, when combined with a rocket launcher with Auto-Loading, is a powerful combination. Holstering is a popular technique that doesn’t require Artifact changes and should work well if no balance tweaks are required. Lasting Impression rockets can deal more damage, but because to the picky wait between the hit and the detonation, some rockets may proc when the Caretaker is immune. If there are enough Orbs of Power generated, Explosive Light can also be used.
Despite the lack of Particle Deconstruction, linear fusion guns are still a viable option for the Caretaker. Gjallarhorn isn’t a horrible pick, though, especially considering other players will almost certainly be employing rocket launchers. Add-clearing Exotics like Witherhoard or Trinity Ghoul can also be paired with a high-damage Heavy and another Special or Primary (depending on what they have at hand). Players, on the other hand, are free to use any loadouts and weapons they like.
Related products
-
priority in line
$5.99 -
Trials Of Osiris Piloted
Rated 5.00 out of 5$24.99Original price was: $24.99.$18.99Current price is: $18.99.


Reviews
There are no reviews yet.